
How to Connect Your Shopify Store to Facebook & Instagram

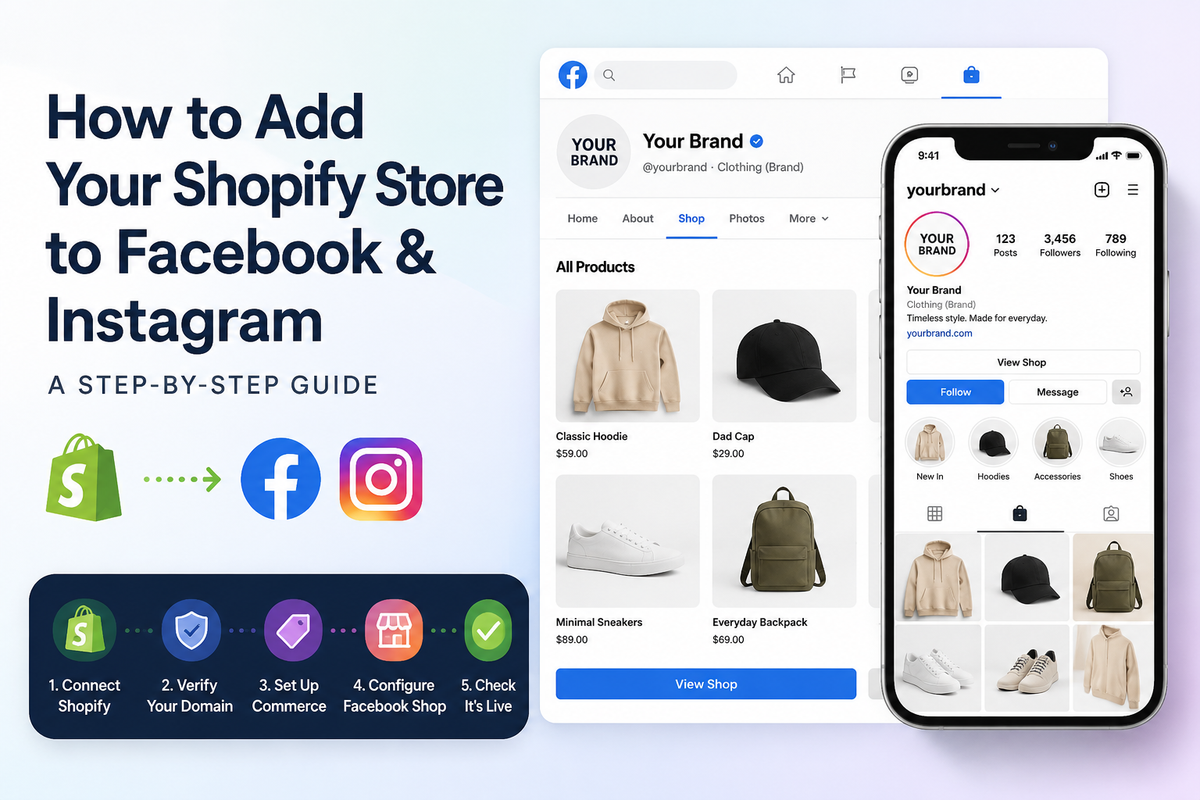
A Step-by-Step Guide by GeekyBee
Who this is for: Any business running a Shopify store that wants their products to appear natively on their Facebook Page and Instagram profile — with a Shop tab, browseable collections, and product tags in posts.
Time required: Around 60–90 minutes, spread across a few days (some steps involve waiting for Meta's approval process).
What you'll need before you start:A live Shopify store with at least one productA Facebook Page (not a personal profile) for your businessAn Instagram Business account linked to that Facebook PageAdmin access to your Facebook Business Manager (business.facebook.com)Admin access to your website (WordPress, Shopify, or wherever your main domain lives)
The Big Picture — What We're Actually Doing
Before we start clicking, it helps to understand what we're building:
Meta (Facebook/Instagram) needs to trust that your Shopify store belongs to you. Until that trust is established, it won't show your shop publicly — even if everything looks "connected" inside the settings panels.
The process has five stages:
- Connect Shopify to Facebook & Instagram — install the sales channel
- Verify your domain — prove to Meta that your website is yours
- Set up your Commerce account — approve your product catalogue
- Configure your Facebook Shop — build collections and layout
- Check it's live — confirm the Shop tab is visible to visitors
Let's go.
Stage 1 — Install the Facebook & Instagram Sales Channel in Shopify
This is the starting point. Everything flows from here.
1.1 Open your Shopify admin: https://admin.shopify.com/store/YOUR-STORE-NAME
1.2 In the left sidebar, look for the Sales channels section. You'll see "Online Store" already there. Click the + (plus) button next to "Sales channels".
1.3 A panel slides in from the right listing available sales channels. Find Facebook & Instagram and click it. Then click Add channel.
1.4 You'll land on the Facebook & Instagram overview page inside Shopify. Click Start setup.
1.5 Shopify will ask you to connect your Facebook account. Click Connect account and log in with the Facebook account that manages your Business Page. When prompted, click Continue as [Your Name] then OK.
1.6 You'll be asked to select:
- Your Facebook Business portfolio — choose the one that owns your Page
- Your Facebook Page — select your business Page
- Your Instagram account — select your linked Instagram Business account
- Your Ad account — select the one associated with your business (or create one)
Click Next after each selection.
1.7 Review the permissions screen. Facebook will ask for a list of permissions. You need all of them — click Done, then Finish setup.
✅ You're now connected. Shopify is talking to Facebook. But your shop isn't live yet — keep going.
Stage 2 — Verify Your Domain with Meta
This is the step most guides skip, and it's why most people end up with a shop that's "active" but invisible. Meta requires proof that you own the domain your store runs on before it will surface your Shop publicly.
What domain do we verify? Always the root domain — i.e. yoursite.com, not shop.yoursite.com. Meta only accepts root domains. Verifying yoursite.com covers all subdomains automatically.
Step 2A — Add your domain to Meta Business Manager
2A.1 Go to: https://business.facebook.com
2A.2 In the left sidebar, click Settings (the gear icon near the bottom left).
2A.3 In the Settings left panel, scroll down to find Brand safety and suitability → click it to expand → click Domains.
2A.4 Click the blue + Add button (top right of the Domains panel).
2A.5 A dialog appears asking "What do you want to do?" Select Create a domain.
2A.6 Another dialog: Add a domain. In the "Your domain" field, type your root domain — e.g. yoursite.com. No https://, no www, no subdomains. Click Add.
2A.7 Meta will now show you a verification snippet. It looks like this:
html
<meta name="facebook-domain-verification" content="XXXXXXXXXXXXXXXXXXXXXXXX" />Copy this entire line — you'll need it in the next step. Don't close this window yet.
Step 2B — Add the verification tag to your website
You need to place this tag inside the <head> section of your website's homepage. How you do this depends on what platform your main website runs on.
If your site runs on WordPress:
Option A — Using WPCode (recommended, lowest risk)
WPCode is a free plugin specifically designed for this. If it's not installed:
- In WordPress admin sidebar: Plugins → Add New → search "WPCode" → Install Now → Activate
Once installed:
- In WordPress admin sidebar: scroll down to find WPCode → click Header & Footer
- You'll see a large text box labelled Header with the description "These scripts will be printed in the
<head>section" - Click inside that box, press End to go to the end of any existing code, press Enter for a new line
- Paste your Meta verification tag
- Click Save Changes (blue button, top right)
Option B — Using Rank Math SEO
If you have Rank Math installed:
- In WordPress admin sidebar: Rank Math → General Settings → Webmaster Tools
- Find the Facebook Pixel or Meta Verification field
- Paste just the
content="XXXX"value (not the whole tag — Rank Math adds the wrapper itself) - Click Save Changes
If your Shopify store IS your main domain (e.g. yoursite.com points directly to Shopify):
- In Shopify admin sidebar: Online Store → Themes
- Next to your active theme, click the ... (three dots) → Edit code
- In the file list on the left, under Layout, click theme.liquid
- The code editor opens. Press Ctrl+F (or Cmd+F on Mac) and search for
</head> - Click just before
</head>to place your cursor there - Press Enter to create a new line above
</head> - Paste your Meta verification tag on that new line
- Click Save (top right)
If your site runs on Squarespace:
- Go to your Squarespace dashboard → Settings → Advanced → Code Injection
- Paste the tag into the Header box
- Click Save
Step 2C — Verify the domain in Meta
2C.1 Go back to the Meta Business Manager Domains page (where you left the window open in Step 2A.7).
2C.2 Wait 2–3 minutes for your website's cache to clear, then click Verify domain.
2C.3 If successful, you'll see a green Verified badge appear next to your domain. That's it — you own your domain in Meta's eyes.
⚠️ If it fails: Meta can take up to 72 hours to find the tag in some cases. Wait 10 minutes and try clicking Verify domain again. If it still fails, check that the tag is actually in your site's HTML source by visiting your homepage, right-clicking → View Page Source, and searching (Ctrl+F) for facebook-domain-verification. If it's not there, the tag wasn't saved correctly — go back and repeat Step 2B.Step 2D — Connect your Facebook Page to the verified domain
While still on the Domains page:
2D.1 Click on your domain name in the list to open its detail panel (right side).
2D.2 Click Connect assets.
2D.3 A dialog appears: "What do you want to connect?" Click Other business assets.
2D.4 Under Select asset type, you'll see "New Pages experience". The right panel shows your Pages. Tick the checkbox next to your business Page.
2D.5 Click Add. You'll see a confirmation: "1 Page has been added to the domain." Click Done.
✅ Domain verification complete. Meta now trusts that your business owns your website.
Stage 3 — Review and Approve Your Product Catalogue
Shopify automatically creates a product catalogue in Meta's Commerce Manager and syncs your products. But you need to check it's clean.
3.1 Go to: https://business.facebook.com/commerce
3.2 In the left sidebar, click Assets (if it's not already selected).
3.3 Under Catalogues, you should see a catalogue named something like "Shopify Product Catalog (yourstore.myshopify.com)". Click on it.
3.4 In the left nav of the catalogue, click Catalogue → Items. You should see all your Shopify products listed. Check that they have:
- A product image
- A price
- A description
- Status showing "Active"
3.5 Still in the left nav, click Diagnostics. This is the most important screen — it shows any errors that are blocking your products. Common issues:
- "Image does not meet minimum size requirements" — your product image is too small (minimum 500×500px). Fix it in Shopify: Products → click the product → upload a larger image.
- "Missing value: price" — the product has no price set. Fix in Shopify.
- "Item URL does not match verified domain" — this is the domain mismatch issue (see Stage 2). Make sure your domain is verified.
Fix any errors flagged here before continuing.
✅ Catalogue is clean. Products are approved and ready.
Stage 4 — Set Up Your Facebook Shop
This is where you build the actual shop that visitors see on your Facebook Page and Instagram profile.
4.1 Still in Commerce Manager (business.facebook.com/commerce), in the left nav click Shops.
4.2 If a shop already exists (Shopify may have created one during setup), click on it. If not, click + Add shop and follow the prompts to create one, selecting your Facebook Page and Catalogue when asked.
4.3 Inside your shop, you'll see options for:
- Collections — groups of products (e.g. "New Arrivals", "T-Shirts", "Sale"). Click Add collection → give it a name → add products to it from your catalogue.
- Featured Collection — the first thing visitors see. Choose your best collection here.
4.4 To set checkout behaviour: in the Shop settings, under Checkout, select Checkout on website. This sends customers to your Shopify store to complete their purchase (the most reliable option for most businesses).
4.5 Click Publish to make the shop live.
⚠️ Note: Meta will review your shop before it goes fully public. This typically takes a few hours to 2 days. You'll get a notification when it's approved.
Stage 5 — Check It's Live
Once Meta has processed your domain verification and shop approval (usually 24–48 hours), do these checks:
5.1 Check your Facebook Page
Go to your Facebook Page (e.g. facebook.com/yourpagename). Look at the tabs below your cover photo:
All · About · Reels · Photos · Followers · More
Click More — you should now see Shop in the dropdown. If you want it as a top-level tab (not buried in "More"), that's currently controlled by Meta automatically based on your shop's activity — it surfaces more prominently as engagement grows.
5.2 Check Instagram Shopping
Open Instagram → go to your business profile → you should see a Shop or View shop button below your bio. If it's not there yet, go to:
Instagram app → Settings → Business → Shopping → select your catalogue → Done.
Instagram Shopping sometimes requires a separate approval step — you may receive a notification in the app to "Set up Instagram Shopping" which walks you through a short review process.
5.3 Add a Shop Now button to your Facebook Page
While you're waiting for the Shop tab to appear, add a direct call-to-action button to your Page:
- Go to your Facebook Page
- Just below your cover photo, look for an existing action button (might say "Send Message" or "Follow") or an option to Add a button
- Click the button → click Edit (or "Add button" if there isn't one)
- Select Shop with you → Shop Now
- Enter your store URL (e.g.
https://shop.yoursite.com) - Click Save
This gives visitors an immediate route to your store while the native Shop tab propagates.
Common Problems and Fixes
| Problem | Most likely cause | Fix |
|---|---|---|
| Shop tab not appearing on Facebook Page | Domain not verified | Complete Stage 2 |
| Products in Shopify not appearing in catalogue | Shopify sync not complete | In Shopify: Facebook & Instagram → Overview → check sync status |
| "Item URL does not match verified domain" error | Custom domain vs myshopify.com mismatch | Verify your custom domain in Meta (Stage 2) |
| Instagram Shopping option not available | Business account not set up | In Instagram app: Settings → Account → Switch to professional account → Business |
| Shop shows in Commerce Manager as Active but not on Page | Meta propagation delay | Wait 24–48 hours after domain verification |
| Verify domain button fails | Tag not live on site yet | Check page source (Ctrl+U) for facebook-domain-verification |
| Products show but no images | Images too small or wrong format | Minimum 500×500px, JPG or PNG, under 8MB |
Quick Reference — Key URLs
| What | Where |
|---|---|
| Shopify admin | admin.shopify.com/store/YOUR-STORE |
| Meta Business Manager | business.facebook.com |
| Meta Commerce Manager | business.facebook.com/commerce |
| Meta Domain Verification | business.facebook.com → Settings → Brand safety → Domains |
| Meta Sharing Debugger (test your domain) | developers.facebook.com/tools/debug |
Frequently Asked Questions
Q: I've done everything in this guide and it's been 48 hours. The Shop tab still isn't showing. What now?
This is more common than it should be. First, go back to Meta Commerce Manager → your Shop → check the status says Active (not "Under review" or "Rejected"). If it says Active, go to Meta Business Manager → Brand Safety → Domains and confirm your domain shows a green Verified badge. If both of those are fine, use Meta's Sharing Debugger (developers.facebook.com/tools/debug) — paste your homepage URL and click Debug. It will show you exactly what Meta can see on your site, including whether it found the verification tag. If the tag is missing from the debugger results, it didn't save correctly — go back to Stage 2B.
Q: Do I need a Facebook Shop AND an Instagram Shop, or is it one setup?
One setup. Since Meta merged everything into a single Commerce Manager, one catalogue and one shop feeds both Facebook and Instagram simultaneously. You manage it all from business.facebook.com/commerce. Instagram Shopping does have a separate approval step inside the Instagram app, but the underlying data (products, collections, prices) is shared.
Q: My store is on shop.mycompany.com. Do I verify shop.mycompany.com or mycompany.com?
Always mycompany.com — the root domain. Meta doesn't accept subdomains for verification. The good news is that verifying the root domain automatically covers all subdomains beneath it, so shop.mycompany.com, www.mycompany.com and everything else are all covered by one verification.
Q: I have a Shopify store but my main website is WordPress. Which one do I add the verification tag to?
The verification tag goes on whichever site serves the root domain — i.e. where yoursite.com points. If yoursite.com is your WordPress site and your Shopify store runs on shop.yoursite.com, the tag goes into WordPress. If yoursite.com points directly to Shopify, the tag goes into Shopify's theme.liquid. When in doubt, visit yoursite.com in a browser — whatever loads is where the tag needs to go.
Q: Will this slow my website down or affect how it looks?
No. The Meta verification tag is a single invisible line of HTML in the page header. It has no visual effect whatsoever, adds no scripts, loads no external content, and has zero impact on page speed. Visitors will never know it's there.
Q: My products are syncing but some aren't appearing. Why?
Several possible reasons — check the Diagnostics tab in Commerce Manager (Stage 3, step 3.5) for the specific error. The most common causes are: product image too small (must be at least 500×500 pixels), missing price, product set to "Draft" in Shopify rather than "Active", or the product URL containing your myshopify.com address rather than your custom domain. Fix the underlying issue in Shopify and the catalogue will re-sync automatically within a few hours.
Q: Do I need a Facebook Business Manager account or can I use my personal Facebook?
You need a Business Manager account (now called a Business Portfolio). If you don't have one, go to business.facebook.com and click Create account — it takes about 5 minutes and is free. You'll then add your Facebook Page to it as an asset. Without Business Manager you cannot complete domain verification, which means your shop will never go fully public.
Q: Can I tag my products in Instagram posts and Reels?
Yes — once Instagram Shopping is approved (see Stage 5), you can tag products in any post, Reel, or Story. When creating a post in the Instagram app, tap Tag products (below the caption field) → search for your product by name → tap it → confirm. Viewers can tap the tag to go directly to that product in your shop.
Q: Meta rejected my shop. What do I do?
First, check the rejection reason in Commerce Manager — Meta will usually state which of their Commerce Policies the shop violated. Common rejection reasons include: products that aren't physical goods (Meta doesn't allow digital downloads, subscriptions, or certain services in Shops), product descriptions that make medical or health claims, or images that don't show the actual product. Fix the flagged items, then in Commerce Manager click Request review to resubmit. You can appeal most rejections.
Q: I've set everything up but when I click "Shop" on my Facebook Page it says "No products available". Why?
This usually means the shop is active but has no collections set up, or the collections exist but have no products added to them. Go to Commerce Manager → Shops → your shop → Collections → make sure at least one collection exists and has products in it. The Facebook Shop needs at least one published collection with at least one product to display anything.
Q: How long does the whole process take from start to finish?
The hands-on work takes 60–90 minutes. The waiting takes longer — Meta's review and propagation process typically adds 24–48 hours before everything is visible to the public. Domain verification is usually instant once the tag is live. Shop approval takes a few hours to 2 days. The Shop tab appearing on your Facebook Page happens automatically once both are done, usually within 48 hours of domain verification completing.
Q: Will I need to do this again if I change my Shopify theme?
No. The Facebook & Instagram sales channel in Shopify is independent of your theme. Changing or updating your theme won't affect your Meta connection. The only thing that could break the link is if you remove the Facebook & Instagram sales channel from Shopify, disconnect the app, or change your domain — in which case you'd need to re-verify the new domain.
Q: Do my customers check out on Facebook/Instagram or on my Shopify store?
With the setup described in this guide, customers click through to your Shopify store to complete their purchase (this is called "checkout on website"). Meta previously offered native in-app checkout but scaled this back significantly outside the US. Checkout on website is the most reliable option for UK and international businesses — you keep full control over the transaction, your Shopify order flow, and your customer data.
Need Help?
If you get stuck at any stage — particularly around domain verification, catalogue errors, or the Shop tab not appearing — GeekyBee can help.
Graham Ford | GeekyBee Ltd 📧 graham@geekybee.net 🌐 geekybee.net
GeekyBee is a North London technology consultancy specialising in digital platforms, SaaS products, and e-commerce integrations. We've done this setup across multiple live client stores — we know where it breaks.
Guide current as of July 2026. Meta's interface changes frequently — if a menu label doesn't match exactly, look for something nearby with the same purpose.